21 January, 2021 | News
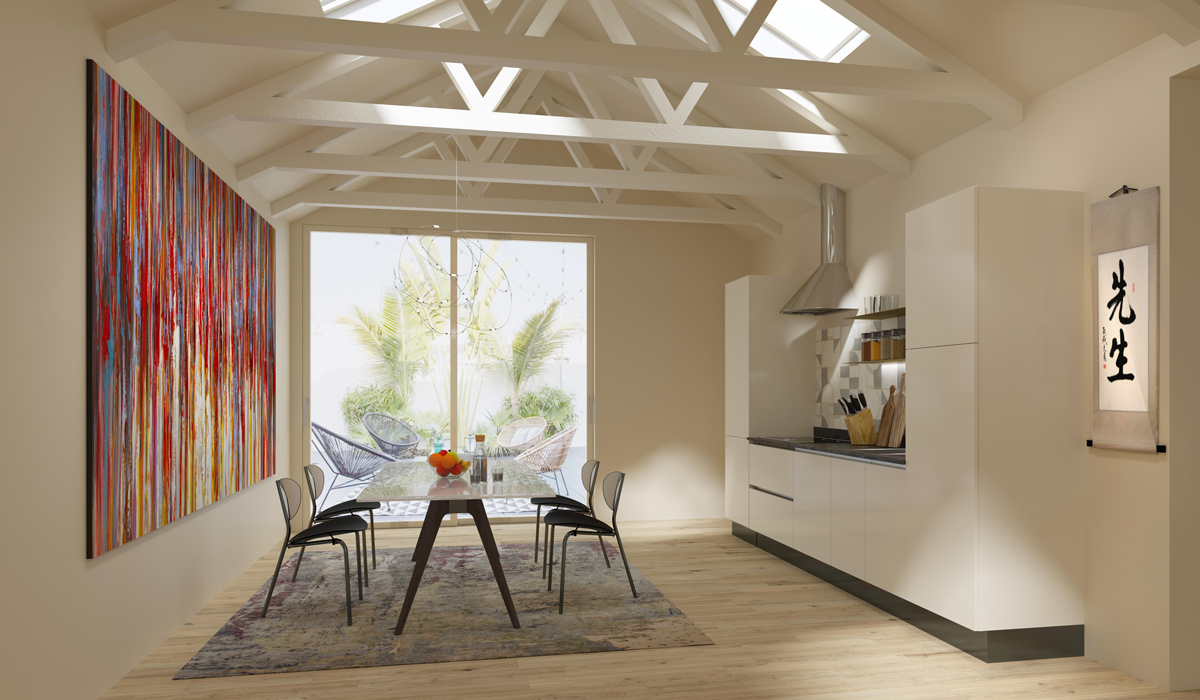
With DomuS3D, you can model, or create specific shapes within the walls of your room. Let’s take a look with the following example:
First, position your mouse on the edge of the wall you want to modify. You should position your mouse on the edge of the wall rather than on its internal structure or body. Right click and select Modify -> Start Modeling.
If your project includes imported floorplans like a DWG or DXF file and there are overlapping walls, hold down the CTRL key while you right click to select the desired wall. Alternatively, you can hide the layer containing the DXF/DWG floorplan.
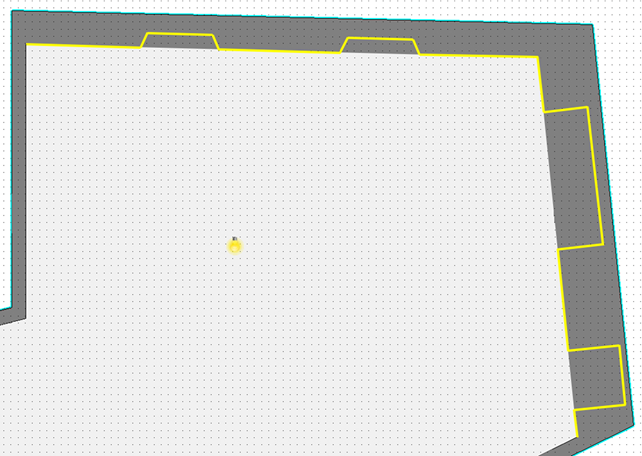
Once the modeling feature is activated, you can trace the outline of the desired shape of the wall, typing exact dimensions into the available fields if desired.
With the modeling command activated, you can right click and select one of the following options:
Using your mouse, you can trace the shape of the desired wall. The command will automatically deactivate when you finish tracing the last segment, reaching the opposite corner of the wall from the starting point.
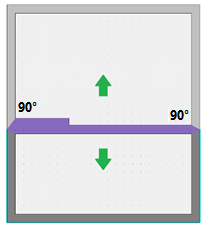
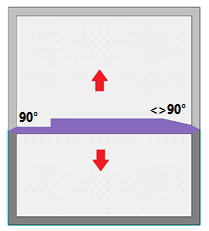
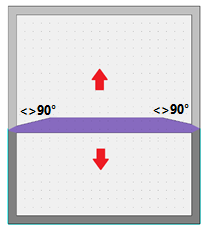
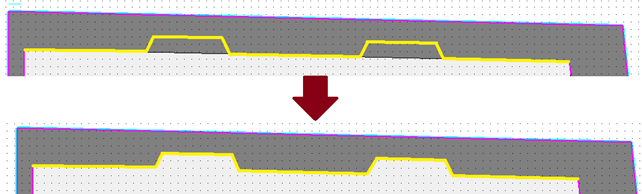
Modeled walls, both perimeter and interior walls, can be moved around the room only when both corners of the wall are square with their adjacent walls.
Below are a few example images: in the first image, both ends of the modeled wall form a 90° angle with their adjacent walls and therefore the wall can be moved. In the other two images, either one or both of the ends of the modeled wall do not form 90° angles with their adjacent walls, and therefore they cannot be moved.